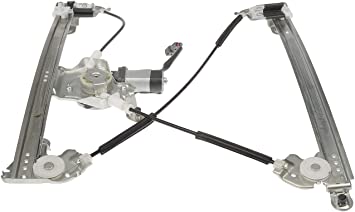
How to replace window regulator & motor assemblies on Toyota 4Runner

A car door and window are several things accumulating. Like there is the attachment of glasses, the motor of glasses and many switches. The important parts here are the window regulator & motor assemblies. This thing is very much a dynamic procedure. All the time it should be running on the process. Its instalment procedure is to be known accurately because it is a complex procedure actually. Here are some procedures for the instalment of window regulator & motor, you can easily follow these procedures.
Step- 1:- Removing the Door Panel - First of all, you have to remove the door panel for working on the motor regulator. So you have to pry off the sail panel. Then pry off the door pull trim. After that, pry off the trim underneath the door pull. Then remove the 7mm screw from the top right. And then remove the two 7mm screws on the bottom of the panel. Then remove the four 7mm screws in the centre of the panel. And now press the door panel with a door panel clip tool or putty knife. Lastly, lift the door panel up and off. And then disconnect the wiring harnesses.
Step-2:- Removing the Window Regulator in this step disconnects the latch rod and runs the window halfway up. Keep a hand on the window and remove the 11mm bolts from the window regulator. After that pull the regulator forward and move the window up. Hold the window in place with painter's tape and remove the two 11mm nuts on the window regulator track. Drill out the six rivets securing the window regulator and disconnect the window motor connector. Pop-out the window track and motor and remove the window regulator.
Step-3:- Installing the Window Regulator is the main step where you have to insert the window motor into the door, Clasp in six rivets with a rivet tool, Connect the window motor and Tighten the two 11mm nuts to the window regulator track. After that reconnect the latch rod. Then test the regulator and run it up to the right height. Here carefully lower the window down to the regulator. Tighten the two 11mm bolts to the window and regulator but if you have an auto feature bring the window up all the way. Hold the button for three seconds, Bring the window down all the way and hold the button for three seconds.
Step-4:- Installing the Door Panel is the last step: connect the wiring harnesses to the door panel then lift the door panel into place. After that push in the door panel clips. Now tighten the four 7mm screws to the centre of the panel. Then tighten the two 7mm screws to the bottom of the panel. Tighten the 7mm screw to the top right. After that press on the trim underneath the door pull. You have to press on the door pull trim. Lastly, press on the sail panel.


